Akai MPC Live 2⁚ A Comprehensive Guide
This guide provides a complete overview of the Akai MPC Live 2, encompassing setup, navigation, beat creation, sampling, MIDI integration, advanced features, troubleshooting, and specifications. Downloadable manuals and additional resources are also included.
Getting Started with Your MPC Live 2
Powering on the MPC Live 2 for the first time initiates a setup process. This process guides you through initial configurations, including language selection and display preferences. The full-color multi-touch display is your primary interface. Take some time exploring the screen, noting the various menus, options, and controls. The on-screen instructions are designed to be intuitive and easy to follow. Don’t hesitate to explore the different sections to familiarize yourself with the layout. Once the initial setup is complete, you are ready to embark on your musical journey.
Setting Up Your MPC Live 2⁚ Connections and Hardware
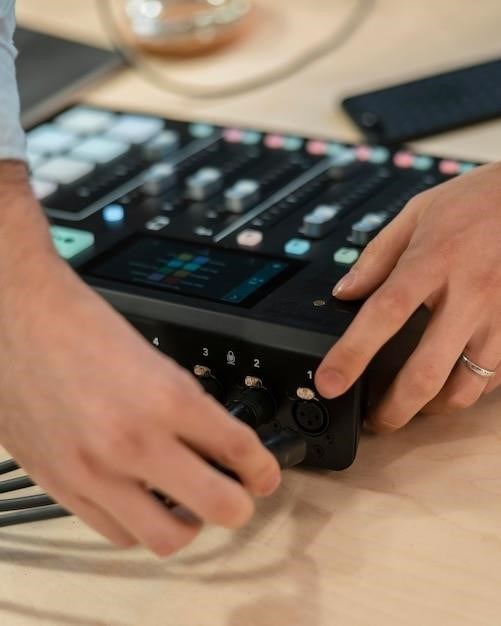
The Akai MPC Live 2 boasts a versatile array of connection options. The rear panel houses multiple ports for seamless integration with your existing setup. A USB-B port connects to your computer for MIDI and audio data transfer, allowing you to use the MPC Live 2 as a controller for your DAW or to transfer projects. A USB-A port allows for direct connection of a USB flash drive for easy file access and management. The MPC Live 2 also features audio inputs and outputs, typically in the form of balanced 1/4-inch jacks, providing options for connecting external instruments, microphones, and studio monitors. These connections provide the ability to integrate the MPC Live 2 into a larger studio setup or use it as a standalone unit. The power switch is located conveniently on the rear panel and next to the battery charging indicator. Consult the manual for specifics regarding audio input levels and impedance.
MIDI connections are crucial for expanding the MPC Live 2’s capabilities. MIDI IN and OUT ports enable communication with other MIDI devices such as synthesizers, drum machines, and controllers. This expands the sonic palette and allows for complex sequencing and arrangement possibilities; Many users find that adding external hardware greatly enhances their workflow. Remember to always consult the appropriate manuals for your external devices to ensure proper connection and configuration. The placement of ports on the rear panel maximizes workflow efficiency and minimizes cable clutter. The specifications provided by Akai highlight the device’s dimensions (243.8mm x 411.5mm x 45.7mm) and weight (3380g), ensuring you can transport it easily.
Navigating the MPC Live 2 Interface⁚ Software and Controls
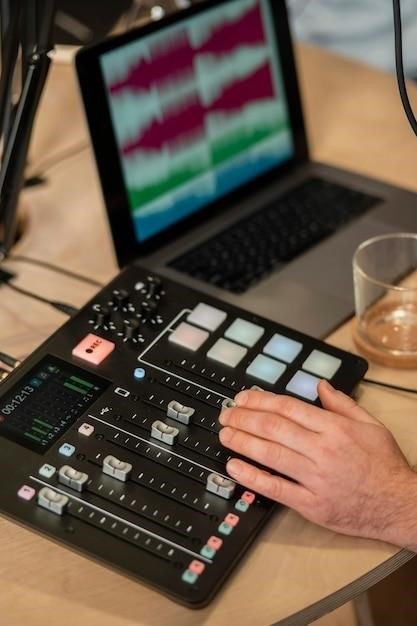
The MPC Live 2’s interface is a blend of intuitive hardware controls and a responsive touchscreen display. The centerpiece is the full-color multi-touch display, providing visual feedback for all aspects of the workflow. Navigation is primarily achieved through a combination of touchscreen gestures and dedicated hardware buttons and knobs. The 16 pads offer a tactile and responsive surface for beat creation and sequencing, with various modes and functions accessible through the software. The numerous knobs allow for real-time parameter adjustment, providing immediate control over sounds and effects. The layout is designed for efficient workflow, with commonly used functions easily accessible. The MPC Live 2’s software is designed to be user-friendly, with a clear and organized layout.
The software offers a variety of views and modes tailored to different production tasks. From browsing samples and creating sequences to mixing and mastering, the software provides a comprehensive suite of tools. The software’s intuitive design ensures a smooth transition between various functionalities. The integration of hardware and software is seamless, allowing for a hybrid approach to music creation. The touchscreen’s responsiveness makes navigating menus and adjusting parameters quick and efficient. Many users find the combination of hardware and software to be incredibly powerful and intuitive, allowing for a highly creative workflow. The detailed manual provides comprehensive guidance on navigating the software and mastering all its features.
MPC Live 2 Workflow⁚ Creating and Editing Beats
The Akai MPC Live 2’s beat-making workflow centers around its intuitive 16-pad sequencer. Begin by selecting sounds from the extensive internal library or by importing your own samples. The pads allow for quick and easy drum programming, utilizing various velocity levels for dynamic expression. Sequences are created by playing the pads in rhythmic patterns. The software provides tools for editing individual notes, adjusting timing, and quantizing to the grid. The MPC Live 2 supports numerous editing features, enabling detailed manipulation of your sequences. This includes functions for copying, pasting, and moving sections of your beats. You can also easily create variations and alternate arrangements within the sequencer.
Advanced features such as note repeat, swing, and various quantization options add depth and complexity to your creations. The integrated effects processing allows for real-time sound shaping, adding polish and character to your beats. The MPC Live 2’s workflow is designed to be flexible, catering to both beginners and seasoned producers. The combination of hardware and software provides a seamless experience, whether you prefer hands-on manipulation or precise digital editing. The intuitive interface and powerful tools streamline the entire process, from initial idea to final mix. The detailed manual provides detailed guidance on mastering the MPC Live 2’s beat creation features, helping you unlock its full creative potential.
Sampling Techniques on the MPC Live 2
The Akai MPC Live 2 excels as a sampler, offering versatile techniques for incorporating external audio into your productions. Direct sampling is achieved through the unit’s audio inputs, allowing you to capture sounds from various sources, including microphones, instruments, and other audio devices; The Live 2’s intuitive interface simplifies the sampling process. Once a sample is captured, you can adjust its start and end points, loop sections, and apply various time-stretching and pitch-shifting algorithms for creative manipulation. The comprehensive editing tools allow for detailed refinement, including the removal of unwanted noise and the adjustment of sample dynamics.
Advanced sampling techniques such as slicing, chopping, and granular synthesis are readily accessible. Slicing divides a sample into individual segments, which can then be individually sequenced and manipulated. Chopping allows for the creation of rhythmic patterns from a single sample. Granular synthesis provides a unique approach, transforming samples into textural soundscapes. The MPC Live 2’s large internal storage capacity ensures ample space for a vast sample library. The ability to import and export samples via USB and other interfaces facilitates seamless integration with other hardware and software. The manual provides a thorough guide to these techniques, including detailed explanations and visual aids, enabling users to fully exploit the sampler’s capabilities and unlock their creative potential.
Working with MIDI on the MPC Live 2
The Akai MPC Live 2 seamlessly integrates with MIDI devices, expanding its creative possibilities. As a MIDI controller, it can send MIDI data to external synthesizers, drum machines, and other instruments, controlling various parameters such as notes, velocity, and modulation. Conversely, the MPC Live 2 functions as a MIDI receiver, capable of receiving MIDI information from external sources. This bidirectional MIDI communication allows for sophisticated setups where the MPC Live 2 acts as the central hub, orchestrating a network of interconnected instruments.
The MPC Live 2’s extensive MIDI capabilities extend to its internal sequencer. Users can program complex MIDI sequences, layering multiple MIDI tracks to create intricate arrangements. Each MIDI track can be programmed with individual notes, velocity, and other MIDI parameters. The unit supports various MIDI controllers, including knobs, sliders, and pads, enabling expressive control over the MIDI data. The integration of MIDI with the MPC Live 2’s sampling capabilities unlocks advanced workflow possibilities, facilitating the creation of hybrid productions combining sampled and synthesized sounds; The comprehensive MIDI implementation details are outlined in the MPC Live 2 manual, enabling users to harness its full potential for creating complex and nuanced musical arrangements.
Advanced Features of the MPC Live 2
Beyond its core functionality, the Akai MPC Live 2 boasts several advanced features enhancing its versatility and workflow. These include sophisticated time-stretching and pitch-shifting algorithms, allowing seamless manipulation of audio samples without artifacts. The MPC Live 2 also offers advanced sampling options, such as loop-based sampling and the ability to create multi-sampled instruments. These capabilities significantly expand the sonic palette and creative possibilities. The unit’s internal effects processing is another key aspect, providing a wide range of high-quality effects, including reverbs, delays, and distortions, all directly accessible within the device itself.
Furthermore, the MPC Live 2 supports various advanced MIDI features, such as aftertouch and MIDI CC control, allowing for fine-grained control over external instruments and effects. Its robust audio routing capabilities facilitate complex signal flows, making it suitable for professional studio environments. The extensive automation options allow users to create dynamic and evolving soundscapes. The MPC Live 2’s comprehensive feature set, detailed in its user manual, positions it as a powerful production tool, facilitating the creation of sophisticated and nuanced musical compositions.
Troubleshooting Common MPC Live 2 Issues
The Akai MPC Live 2, while robust, may occasionally present operational challenges. This section addresses common issues and offers solutions. A frequently encountered problem is connectivity issues. Ensure all cables are securely connected to both the MPC Live 2 and external devices. Check for any damaged or faulty cables and replace as needed. If using a USB connection, try a different port or USB cable. Software glitches can also occur. A simple power cycle often resolves minor software errors. If persistent issues persist, consult the official Akai website for software updates and bug fixes. Remember to always back up your projects regularly to prevent data loss.
Audio problems are another potential hurdle. Confirm that the audio input and output levels are correctly adjusted. Examine the audio routing configuration to ensure signals are correctly routed. If experiencing audio dropouts, try reducing the number of simultaneously active tracks or instruments. If the problem persists, consult the MPC Live 2 manual for more detailed troubleshooting steps or contact Akai support. By systematically checking connections, software, and audio settings, you can effectively resolve most common issues, ensuring a smooth workflow with your Akai MPC Live 2.
Factory Resetting Your MPC Live 2

A factory reset restores your Akai MPC Live 2 to its original settings, erasing all custom configurations, user projects, and saved data. This is a useful troubleshooting step for resolving persistent software problems or if you’re preparing to sell or give away the device. Before proceeding, ensure you’ve backed up any essential data, as this process is irreversible. The exact steps may vary slightly depending on the firmware version, so consult your MPC Live 2 manual for the most accurate instructions.
Generally, the process involves navigating to the system settings menu, usually accessible through a combination of hardware buttons and on-screen menus. Look for an option labeled “Factory Reset,” “Reset to Defaults,” or similar terminology. The device may prompt for confirmation before proceeding. Once initiated, the reset process will take a few moments to complete. Upon completion, your MPC Live 2 will reboot, presenting the initial setup screen. You’ll need to reconfigure your settings, including preferences, audio routing, and MIDI connections. Remember to refer to the official Akai website and support documentation for the most up-to-date reset procedure and any additional precautions.
Understanding MPC Live 2 Specifications

The Akai MPC Live 2 boasts impressive specifications for a portable production powerhouse. Key features include its high-resolution multi-touch display, providing intuitive visual feedback and control. The integrated 16GB of internal storage offers ample space for samples, projects, and virtual instruments. Its powerful processor ensures smooth performance even with complex projects, and the integrated effects engine allows for on-the-fly sound shaping and manipulation. The durable build quality and rechargeable battery make it ideal for both studio and on-the-go production.
Connectivity options are extensive, including multiple audio inputs and outputs for integrating external instruments and effects. MIDI capabilities allow seamless interaction with synthesizers, drum machines, and other controllers. USB connectivity enables storage expansion, software updates, and convenient file transfer. The MPC Live 2’s dimensions and weight are optimized for portability, allowing for effortless transport. The precise dimensions and weight can be found in the official Akai MPC Live 2 user manual or on the Akai Professional website. This comprehensive specification sheet will clarify all technical details and further enhance your understanding of this versatile instrument.
Downloading the MPC Live 2 Manual
Accessing the comprehensive Akai MPC Live 2 manual is straightforward. Akai Professional provides the official user guide as a downloadable PDF file on their website. Navigate to the product support section for the MPC Live 2, usually found under a “Support” or “Downloads” tab. Look for the user manual specifically labeled for the MPC Live 2. The file will likely be quite large, given the device’s complexity, so ensure you have sufficient storage space before initiating the download. Once downloaded, open the PDF file using a suitable PDF reader application.
Alternatively, you might find the manual on third-party websites specializing in product manuals. However, always prioritize downloading from the official Akai Professional website to ensure authenticity and access to the latest version. The official manual will provide the most accurate and up-to-date information, including any revisions or updates to the device’s functionality and features. Regularly check the Akai website for updated manuals, as improvements or corrections might be released periodically. Having the manual readily available is crucial for maximizing your MPC Live 2 experience.
Additional Resources and Tutorials for MPC Live 2
Beyond the official Akai MPC Live 2 manual, a wealth of supplementary resources exists to enhance your learning and creativity. Numerous online video tutorials are available on platforms like YouTube, offering step-by-step guidance on various aspects of the device, from basic operation to advanced techniques. These tutorials often cover specific features, workflows, and production styles, providing practical examples and insights. Many experienced MPC users create and share their tutorials, offering diverse perspectives and approaches.
Websites dedicated to music production and the Akai MPC series provide additional support. These sites often feature forums where users can ask questions, share tips, and troubleshoot problems. You’ll find discussions on various topics, from resolving technical issues to exploring creative workflows. Furthermore, consider exploring online courses focusing on music production using the MPC Live 2. These courses offer structured learning paths, often with expert instructors, providing a comprehensive understanding of the device’s capabilities and how to integrate it into your music production process.
